

Introduction:
The Importance of Setting Up Browser &Server-Side Conversion Tracking
The Impact of the iOS 14 Update:
Restricted Access to User Events:
Embracing Advanced Tracking Techniques:
So, let’s dive into the details and start learning how to set up Facebook Conversion with CAPI and deduplication!
Browser-Side Setup
Step 1: Create a Google Tag Manager(GTM) Account
- Firstly, go to the GTM website and log in using your Google account details.
- Next, click on the “Create Account” button and give a unique name for your container.
Step 2: Set Up a New Container
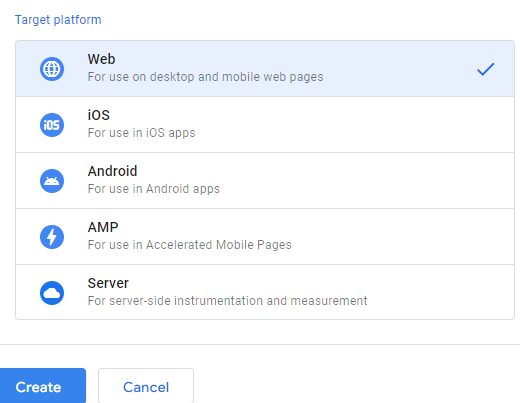
- After that, select the container type as “Web” and click on the “Create” button to proceed.
Step 3: Add the Container Code Snippet
- Then, copy the head and body code snippets from the tracking code pop-up provided by GTM.
- Next, go to your ClickFunnels account and navigate to the specific funnel or page where you want to add the GTM container.
- After that, click on “Settings” at the top right corner of the page.
- Scroll down to the “Tracking Code” section and paste the head code snippet into the “Head Tracking Code” field.
- Similarly, paste the body code snippet into the “Body Tracking Code” field.

- Finally, click “Save” to apply the changes.
Step 4: Add Templates in Google Tag Manager Tag Templates:
- Firstly, go to your GTM container and click on “Templates” on the left-hand side of the GTM interface.
- Then, in the “Tag Templates” section, click on “Search Gallery”.
- Type “Facebook Pixel” in the search bar and press enter.
- Look for the “Facebook Pixel” template by “Facebook Archive” in the search results.
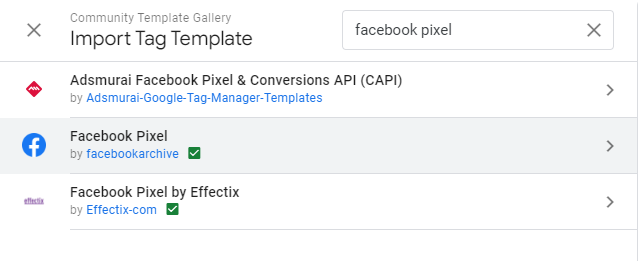
- Click on the template to view its details, and then click “Add” to add the Facebook Pixel template to your GTM workspace.
Variable Templates:
- First, click on “Variable Templates” in GTM.
- Then, click on “Search Gallery”.
- Type “Event ID” in the search bar and press enter.
- Look for the “Event ID” template by “mbaersch” in the search results.
- Click “Add” to add the Event ID template to your GTM workspace.
Note:
Step 5: Setting up Facebook Pixel in Facebook Event Manager
- First, go to Facebook Event Manager and log in. Then, click on “Events Manager” in the left menu.
- Next, click “Connect Data Sources” to create a new pixel. Select “Web” for pixel type and give it a name.
- After that, click “Create” to create a new pixel or select an existing one.
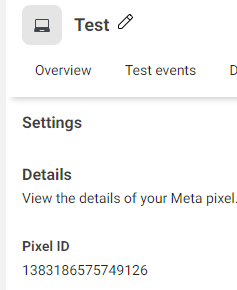
- Access pixel settings by clicking on the pixel, and then clicking “Settings” in the top right corner.
- Finally, copy Pixel ID displayed for use in Google Tag Manager.
Note:
Step 6: Setting up Variables in Google Tag Manager
Firstly,
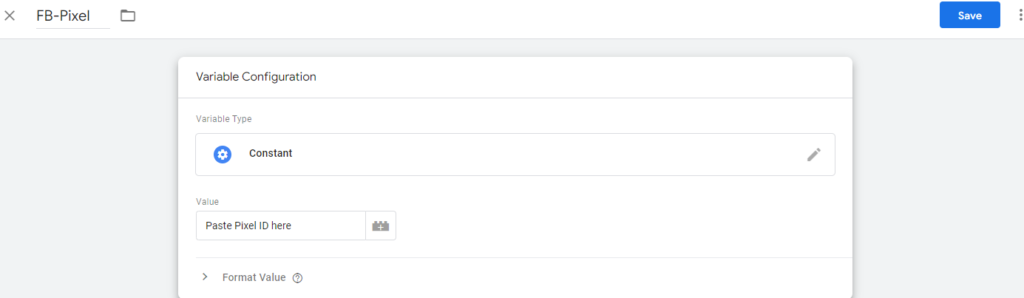
- In GTM, click “Variables” in the left menu. Then, click “New” to create a new variable. Name the first variable “FB-Pixel” and select “Constant”.
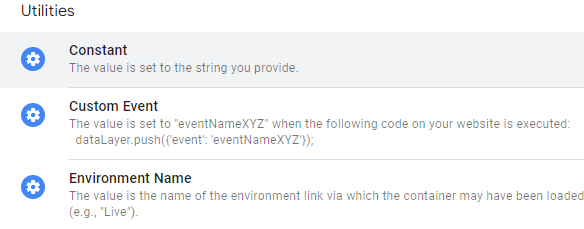
- After that, paste Facebook Pixel ID in the box and click “Save”.
Secondly,
Thirdly,
Fourthly,
Finally,
Note:
Step 7: Set Up Triggers in Google Tag Manager, you need to:
- Click on “Triggers” in your GTM account’s left-side menu.
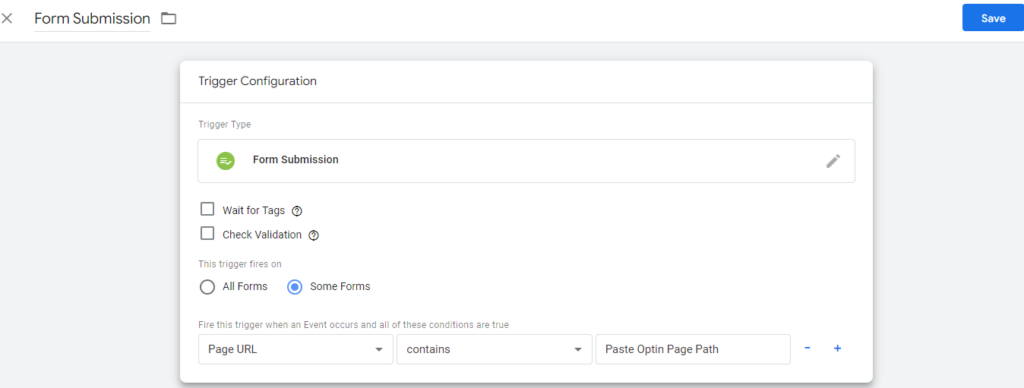
- Click on “New” to create a new trigger, and select the trigger type “Form Submission” for the Lead trigger.
- Under “Configure Trigger,” select “Some Forms.”
- In the first box, change it to “Page URL,” and in the second box, select “Contains.”
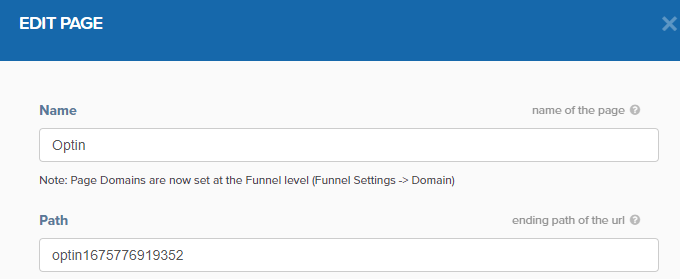
- In the third box, enter the page path of the ClickFunnels step for lead.
- Click “Save” to create the Lead trigger.
Next, create a trigger for Page View and select the trigger type “Page View.”
- Under “Configure Trigger,” select “All Pages” for the trigger to fire on all pages.
- Click “Save” to create the Page View trigger.
- Lastly, create a trigger for Purchase and select the trigger type as “Page View.”
- Under “Configure Trigger,” select “Some Page” for the trigger.
- In the first box, change it to “Page URL,” and in the second box, select “Contains.”
- In the third box, enter the page path of the ClickFunnels step for purchase.
- Click “Save” to create the Purchase trigger.
Obtaining the Page Path for ClickFunnels Lead and Purchase Forms
Note:
Step 8: Create Facebook Pixel Tags
To create Facebook Pixel tags, follow these steps:
- Click on “New” to create a new tag in GTM.
- Click on “Tag Configuration” to configure the tag, and search for the “Facebook Pixel” template.
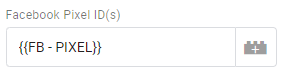
- In the “Settings” section, click on the Lego-type logo next to the “Pixel ID” box, and select the “FB-Pixel” variable that you created in the variable setup step.
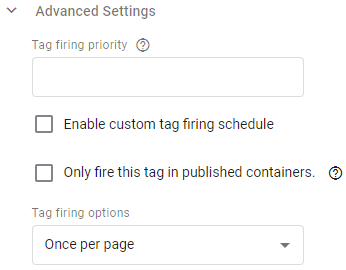
- For the Page View tag, select “Page View” from the “Event Name” drop-down menu, and scroll down to the “Advanced Settings” section.
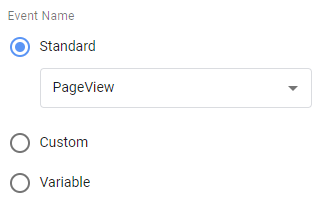
- Change the “Tag Firing Option” to “Once per Page” and click on “Triggering” below the tag configuration.
- Select the “Page View” trigger that you created in the trigger setup steps and click “Save” to create the tag and associate it with the trigger.
- For the Lead Event tag, select “Lead” as the event name in the “Event Name” settings, and enable “Advanced Matching” in the “Advanced Settings” section.
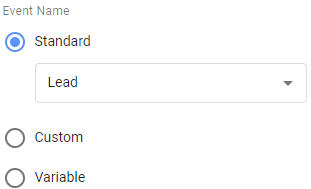
- In the “Customer Information Data Parameters” settings, add relevant parameters such as first name and last name, and select the “Lead” trigger that you created earlier in the trigger setup step.
- For the Purchase Event tag, select “Purchase” as the event name in the “Event Name” settings, and enable “Advanced Matching”.
- In the “Customer Information Data Parameters” settings, add parameters such as first name and last name, if desired.
- In the “Tag Firing Options” section, select “Once per Page,” and click on “Triggering” below the tag configuration.
- Click on “Add” to add a trigger, select the “Purchase” trigger that you created earlier in the trigger setup step, and click “Save” to assign the “Purchase” trigger to the Purchase event tag.
Note:
Using the Pixel,
Step 9: Obtain the Measurement ID for Google Analytics 4
Once
Note:
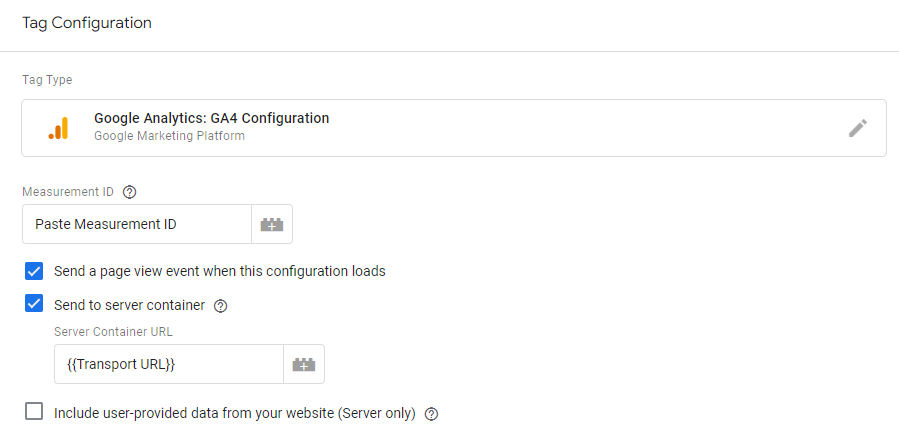
Step 10: Create a GA4 Page View Tag in GTM

Next,
Step 11: Set up a GA4 Lead Tag
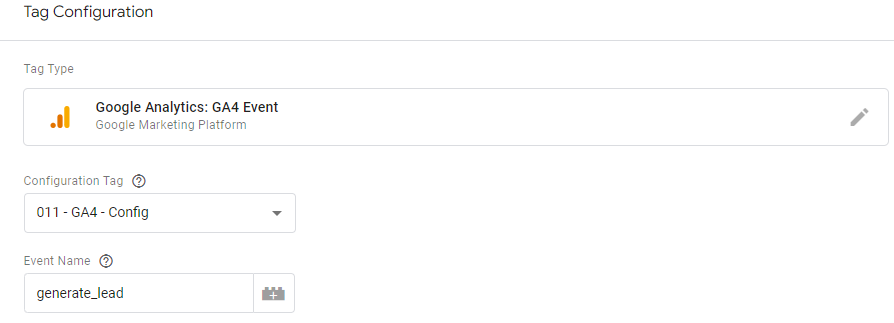
- To set up a GA4 Lead Tag in Google Tag Manager, follow the same steps as in Step 10 to create a new tag. In the tag configuration, select “Google Analytics: GA4 Event”.

- Set the “Configuration Tag” to “GA4-Config”. In the “Event Name” settings, enter “generate_lead” for the Lead event. You can also add any desired “Event Parameters” and “User Properties”.
- To set the tag firing option, select “Once per Page”. Then, select the trigger as “Lead” to track the GA4 Lead event based on the trigger you created earlier.
Step 12: Generate a GA4 Purchase Tag
Set the “Configuration Tag” to “GA4-Config”. In the “Event Name” settings, enter “purchase” for the Purchase event. You can also add any desired “Event Parameters” and “User Properties”.
Note:
Server-Side Setup
Step 13: Setting Up Server Tracking with Google Cloud and App Engine
- To begin, create a new Google Cloud project and enable App Engine.
- Next, set up server tracking for your website by adding a custom domain and subdomain in App Engine settings.
- Finally, copy the URL and paste it into the transport URL variable.
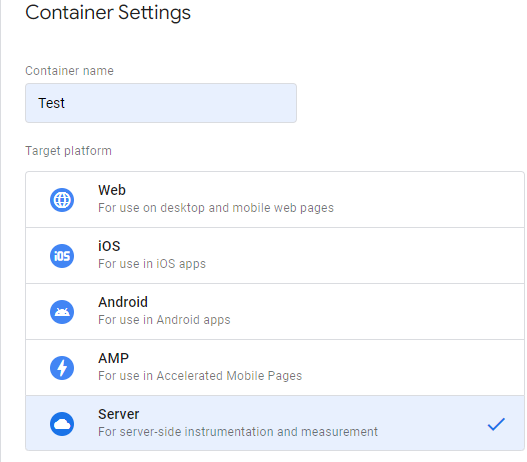
Step 14: Creating a Server-Side Container
- First, go to the GTM homepage, click on “Create Container” under the “Containers” section, and choose “Server” as the container type.
- Then, complete the auto-provisioning process accepting the terms of service.
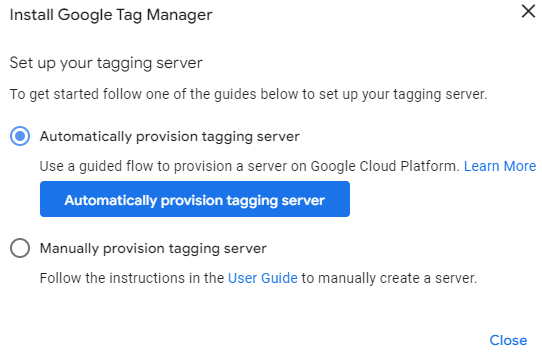
- If prompted, you will be asked to add a billing account. Follow the prompts to provide the necessary billing information.
- Complete the auto-provisioning process by following the on-screen instructions, such as selecting the desired server location and accepting the terms of service.
Step 15: Adding Facebook Conversions API Tag Template
- In the GTM container, click on “Templates” and then “Search Gallery”.
- Next, search for the “conversions API tag” and look for the “Conversions API Tag” by the “FacebookIncubator” template.
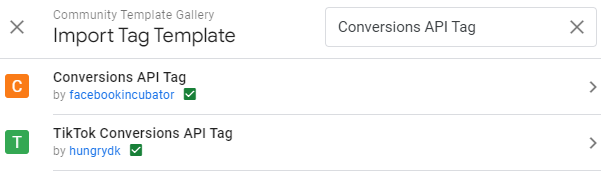
- Finally, click on “Add to Workspace” to add the template.
Step 16: Creating Variables for Facebook Pixel and Access Token
- Go to “Variables” and click on “New”. For the “Facebook Pixel ID” variable, select “Variable Configuration” and choose “Constant”. Enter a descriptive name for the variable and paste the Facebook Pixel ID in the “Variable Value” field. Save the variable.
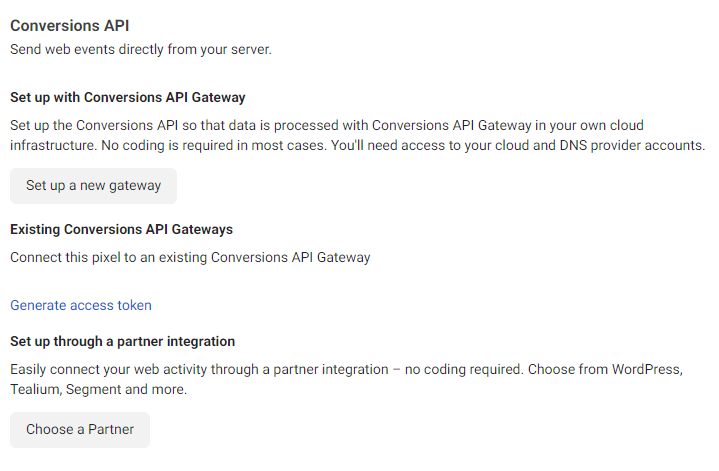
Getting the Facebook Access Token
-
Firstly, you need to open Facebook Events Manager and navigate to the settings of the pixel that you created for the WEB setup.
-
Once there, scroll down to the Conversion API section. Under this section, you will see a button labeled “Generate Access Token”. Click on this button to generate the access token that you need for your tracking implementation.
-
The access token will be displayed in the “Access Token” field. To copy it to your clipboard, simply click on the “Copy” button.
-
Now that you have the access token, the next step is to create a variable in Google Tag Manager to dynamically populate the Facebook Access Token value
-
. To do this, go to the “Variables” section in GTM and click on “New”. Select “Constant” as the variable type, and then enter a descriptive name for the variable.
-
In the “Variable Value” field, paste the Facebook Access Token that you obtained from Facebook Events Manager. Finally, save the variable.
By following these steps, you can successfully create a variable for the Facebook Access Token and dynamically populate its value in your Facebook Pixel tracking implementation.
Step 17: Custom Triggers for Page Views, Lead Generation, and Purchases
- go to the “Triggers” section in your container and click “New”.
- Choose “Custom Event” as the trigger type.
- Under the “This trigger fires on” section, select “Some Events” and choose “Client Name” equals “GA4”.
- Then, choose “Event Name” equals “page_view” for page views, “generate_lead” for lead generation, and “purchase” for purchases.
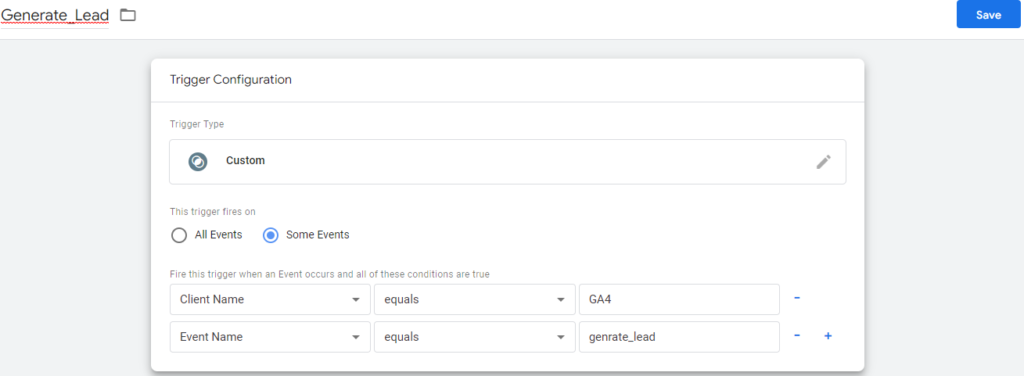
- Save the triggers once you’ve set up the trigger conditions.
Step 18: Setup Conversion API Tags
- go to the “Tags” section in your container and click “New”.
- Choose “Conversion API” as the tag type.
- Select the Conversion API tag template you added from the templates gallery, and then select “FB-Pixel” from the drop-down menu for the “Pixel ID” box.
- Choose “FB-Token” for the “Access Token” field, and “Website” for the “Action Source” field.
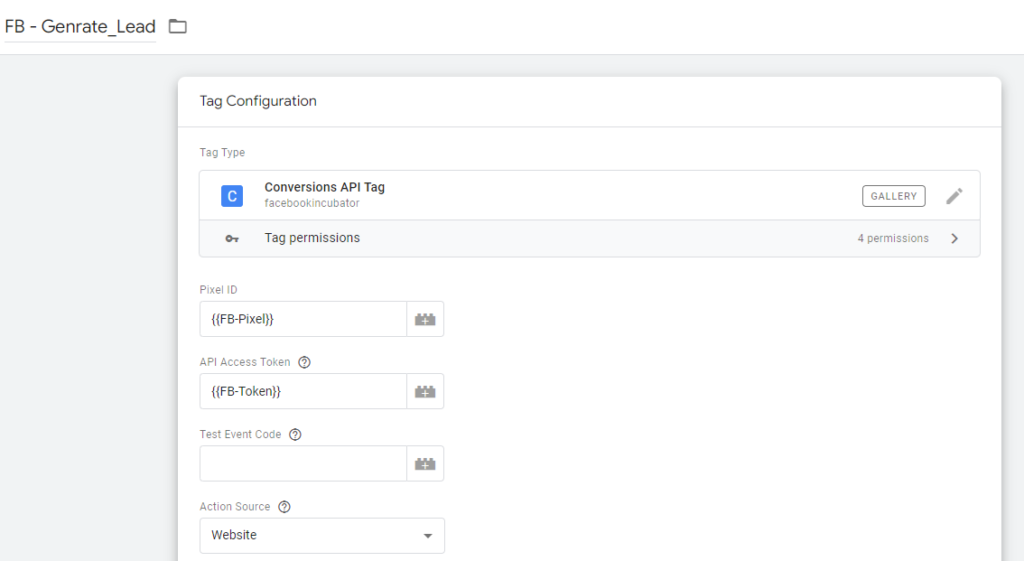
- For each tag, select the corresponding trigger you created earlier: “page_view” for page views, “generate_lead” for lead generation, and “purchase” for purchases.
- Save the tags once you’ve associated them with the right triggers.
Note:
Conclusion:
If you’re interested in taking your ad tracking to the next level, contact WeTrackAds today. Our team of experienced professionals can help you achieve your advertising goals and maximize your return on investment.
Uncover the secrets to achieving exceptional results through the powerful combination of conversion tracking and ad attributions with Hyros and Facebook.